One of the possible options for «Login» to the WiFi service via the captive portal is the «Login» with a PIN or access key. This type of «Login» requires a key that must be created beforehand and provided to the end user.
Access the PIN creation module from the USERS menu: ![]()
There are three types of PINs: WIFI, TRIAL, and BUSINESS CORNER.
-
- WIFI PIN: This is the most common PIN type. It generates an access key for the «PIN login» method, which must be linked to a specific WiFi service.
-
- TRIAL PIN: Generates an access key for the «PIN login» method specifically linked to a TRIAL service.
-
- BUSINESS CORNER PIN: Generates an access key for the «PIN login» method exclusively used for the WiFi service via the Business Corner captive portal.
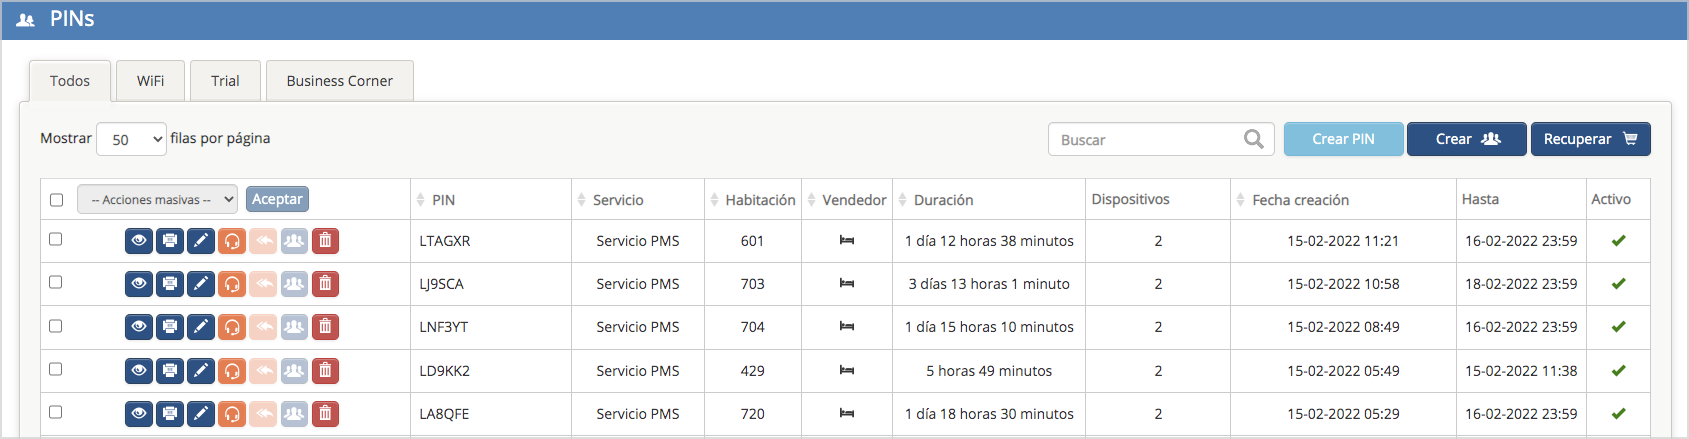
From this section, you can create a single PIN or a group of PINs. It also displays a list of all PINs created to date, including information such as: the PIN key, associated service type, duration, number of devices allowed to connect using the same key, creation date, expiration date, and current status (active or inactive).
In this ACTIVE PINS list, you can perform the following actions:
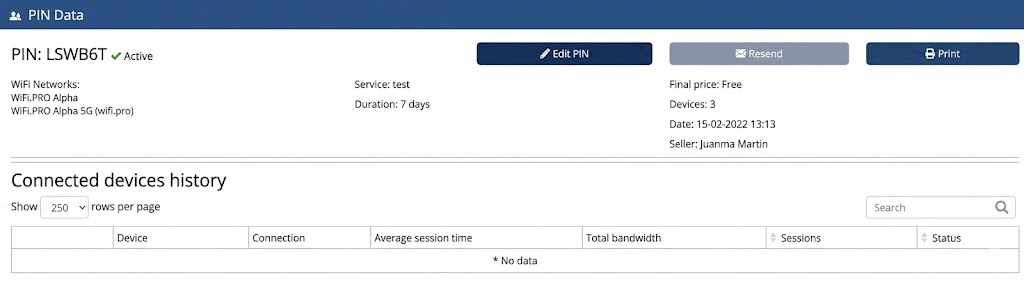
![]() View: Displays the PIN and all its parameters. Additionally, the PIN can be edited or printed from this view.
View: Displays the PIN and all its parameters. Additionally, the PIN can be edited or printed from this view.
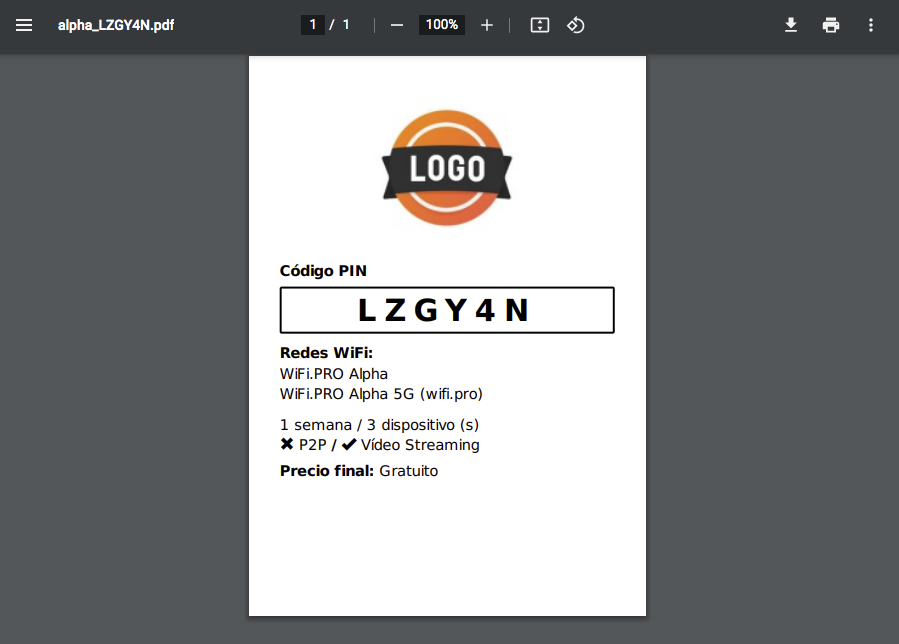
![]() Print: Generates a PDF file that can be sent to a printer and handed to the end user.
Print: Generates a PDF file that can be sent to a printer and handed to the end user.
![]() Edit: Allows you to modify PIN values, such as the access key, duration, and the number of allowed devices.
Edit: Allows you to modify PIN values, such as the access key, duration, and the number of allowed devices.
![]() Incident: Opens a support ticket using this specific PIN as a reference.
Incident: Opens a support ticket using this specific PIN as a reference.
![]() Refund: Only available for instances where a paid service option is active.
Refund: Only available for instances where a paid service option is active.
![]() Group Icon: Allows interaction with PINs that belong to a group; options include printing the group, exporting to Excel, or editing PINs individually.
Group Icon: Allows interaction with PINs that belong to a group; options include printing the group, exporting to Excel, or editing PINs individually.
![]() Delete: Deactivates and removes a PIN.
Delete: Deactivates and removes a PIN.

The Create PIN button opens the window where a PIN is created and its parameters are defined.
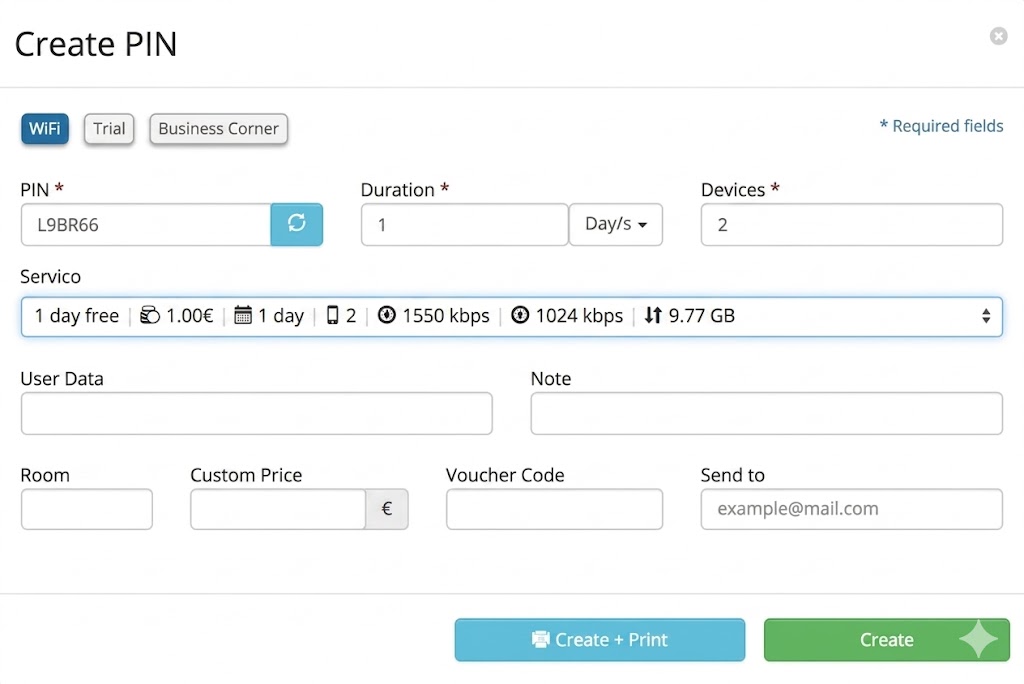
The PIN is automatically generated, but it can optionally be parameterized to be editable. Refer to CONFIGURE SITE / PINs to enable this and other options when creating a PIN.
Duration: (The period the PIN will remain active).
Devices: (Number of devices that can connect using the same key/PIN). These are mandatory parameters and will define the end user’s experience when connecting to the WiFi.
Service: Automatically displays a pop-up window after filling in the Duration and Devices fields. This window shows the services that most closely match the entered data (if available).
Red Data: Data shown in red indicates service parameters that do not match the entered Duration or Device values. In such cases, the manually entered data will always take precedence when creating the PIN.
Email Delivery: There is also an option to send the PIN key via email at the moment it is generated.
Default Setting: By default, the site is created with a 1-day service for 1 device.
For more information on service creation, see the WiFi Service Management section.

This button creates the PIN and opens a window simulating the sheet to be printed. This ticket or sheet contains all the parameters that make up the PIN. This sheet can be configured from the section: ![]() + Ticket Printing.
+ Ticket Printing.

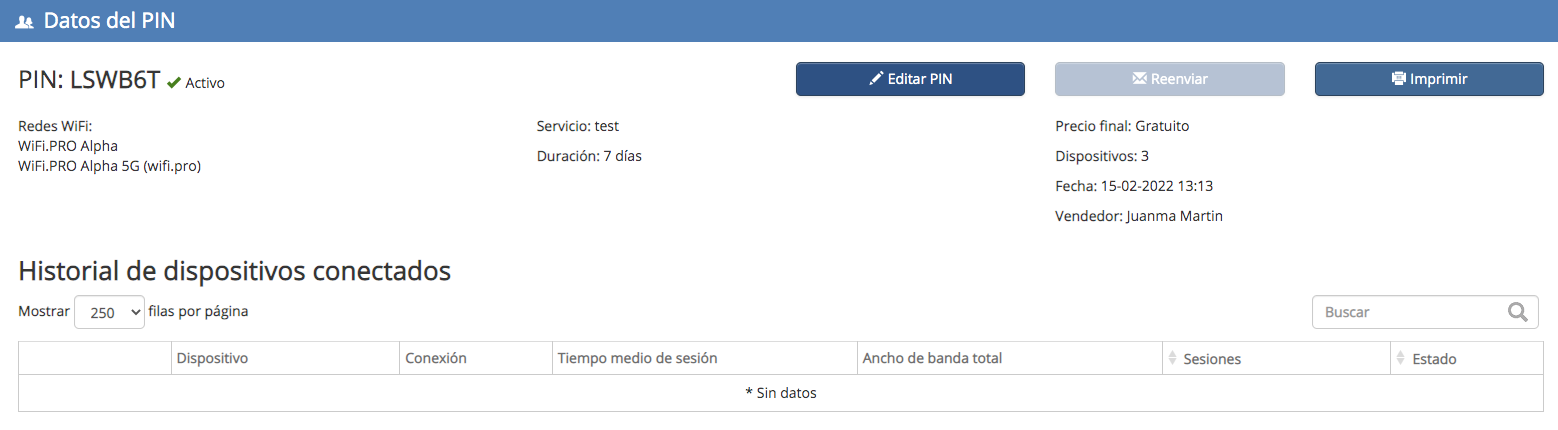
This button creates the PIN and opens a window specifying all the characteristics of the newly created PIN. From this same window, you can edit its parameters and print the PIN.

Creates a group of PINs at once. Its operation is identical to creating a single PIN, but the «Number of PINs» field must be filled in. The maximum number of PINs that can be created at one time is 500.
After creation, a window opens showing all created PINs, from which they can be printed or exported to Excel.

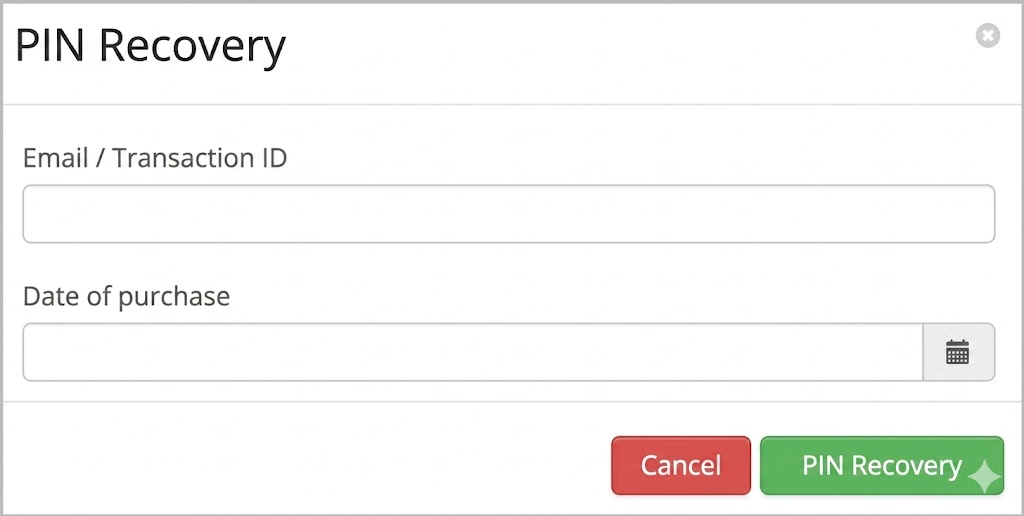
The Recover button allows the PIN to be retrieved in the event that the end user requests it.
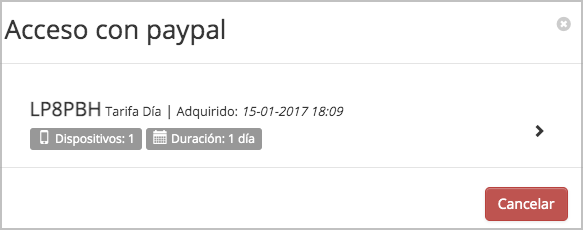
The paid WiFi modality allows end users to sign up for a WiFi service and pay for it. This is done directly from the captive portal using their PayPal credentials. The PIN, or access keys, are sent via email.
The «Recover» button opens a window where the email and the acquisition or creation date of the PIN are required.
![]() Displays a second window with the PIN information.
Displays a second window with the PIN information.
![]() «It allows access to the ‘Edit PIN’ window, from where you can modify its parameters, print them, or send them to the end user.»
«It allows access to the ‘Edit PIN’ window, from where you can modify its parameters, print them, or send them to the end user.»